I'm on a year long journey to cook something each week that I've never cooked before.

Wednesday, March 30, 2011

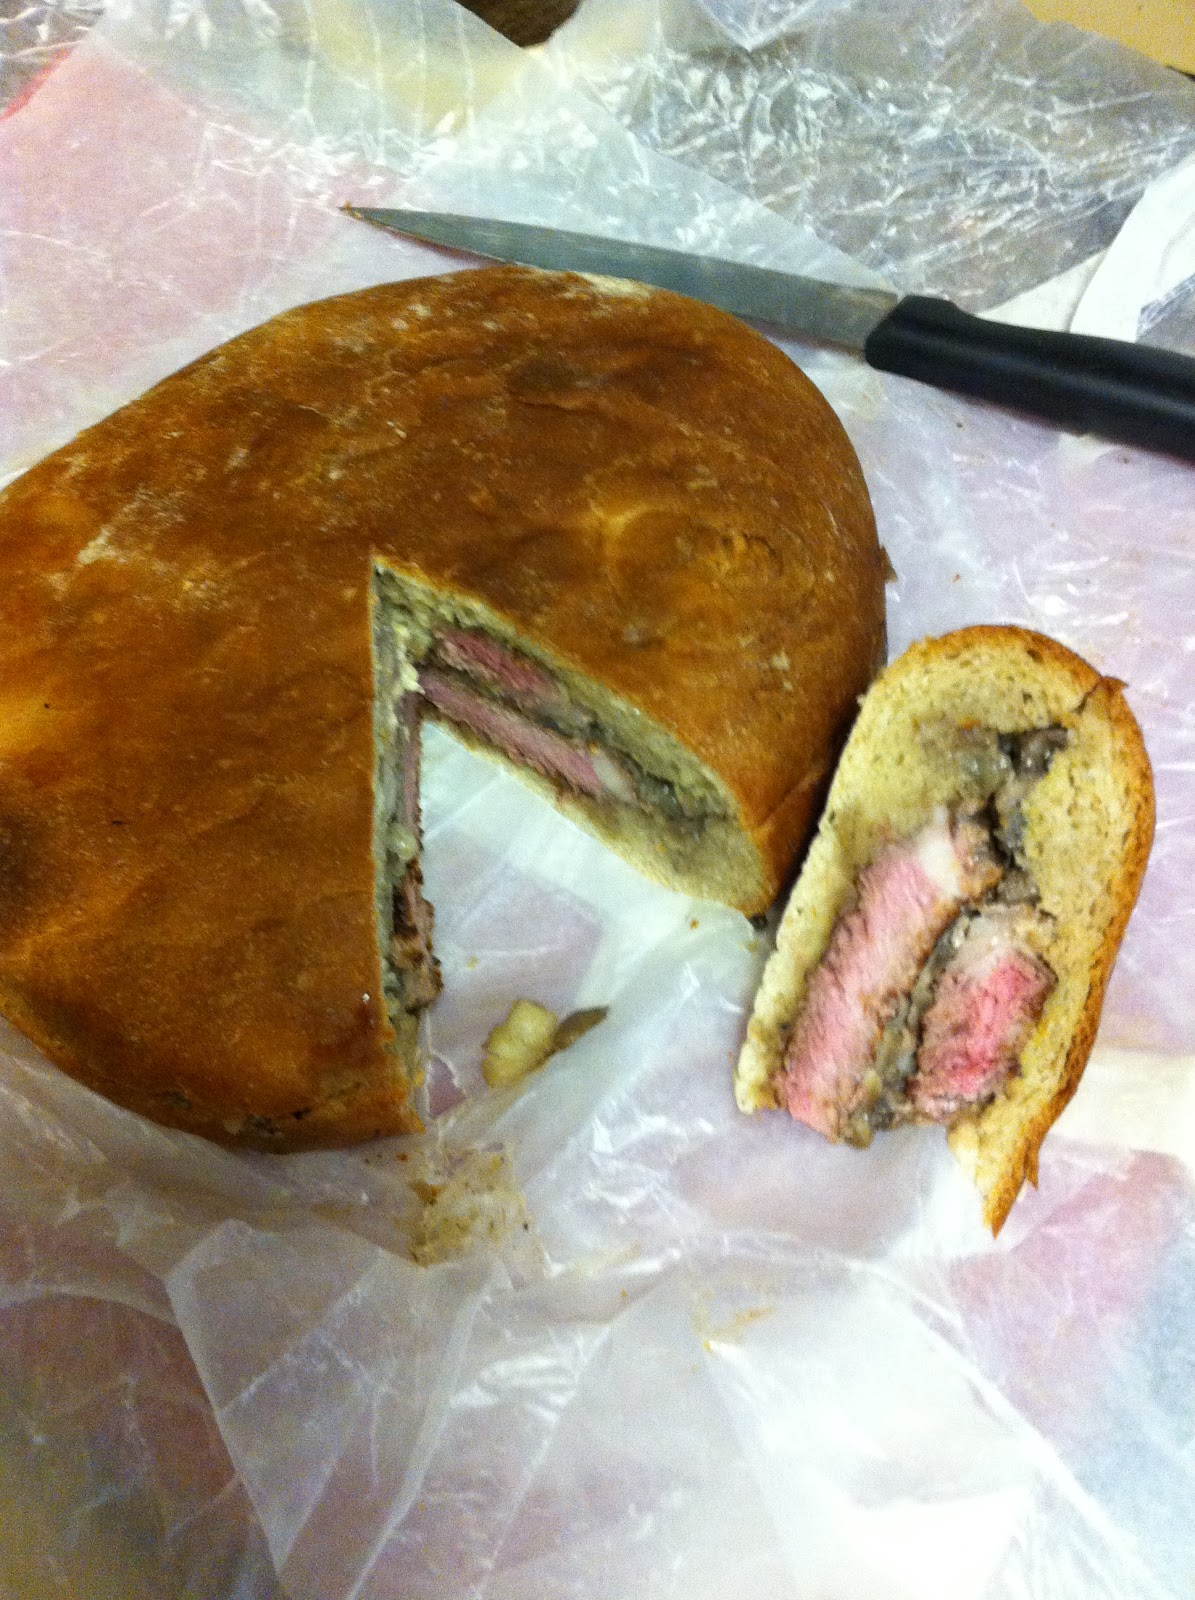
Week 13: Meat! - Shooter Sandwich

The internet is a great font of ideas.  Most of them are rubbish, but sometimes a gem comes through.  I was surfing one of my favorite sites and came across the recipe for a sandwich that sounded crazy and delicious; the Shooter.

Not only did the site have directions for how to make it, but it had beautiful step by step pictures as well.  How could I go wrong?

As usual I went overboard to get the best ingredients I could.  If I'm going to make it, I'm going to make it the best I can.  That way if it's fantastic I can try pulling back a bit and seeing if it's still good, and if I don't like it then there's a good chance that it wont get better with worse ingredients and I can leave it be.

I went to the butcher at the Pike Place Market and got two lovely rib eye steaks.  They looked so good I almost felt bad that I was going to put them in a sandwich... almost.  While I was there I got some shallots and mushrooms at one of the vegetable stands.  I opted to stick to the recipe and use standard white mushrooms rather than branch out for more flavorful brands.  I figured the meat didn't need any competition.

I made my own bread to start with. I'm starting to dial in on the proper way to make it.  I've been trying to nail down their "scoop and sweep" method for measuring flour, but my dough always ends up too thick, so I know it's not working well.  I need to figure out the proper weight of flour (ala Alton.)  You can't go much wrong measuring by weight. This time, though, it worked pretty well.  My bread did not end up as dense as it often is.  Besides, you have to scoop it out!  The biggest problem is that the bread wasn't big enough.  Next time I'd do it a bit bigger.


I cooked the shallots and mushrooms with three cloves of garlic in about 2 TBS of butter.  I cooked them until there wasn't much extra liquid left in the pan, but not until they were sticking to it.  It takes a while, so patience is key.

Then I cooked the steaks.  Normally I use a combination stovetop/oven method to cook steaks, but here I wasn't going to be as picky.  The recipe just calls for stovetop, so I did that.


The picture doesn't do much justice to the process, but the next one is great.  Once the steaks were done, I put one of them in the hollowed out bread, straight from the pan.


I spooned on the mushrooms and shallots.


Added THE SECOND STEAK!  Sorry... any recipe with TWO steaks gets me a bit excited.  I put creamy horseradish sauce on and some brown mustard in the top. It didn't fit very well, so I had to trim a few pieces off. I disposed of them properly.


Then I sealed the whole thing up in wax paper and aluminum foil.


I put it in the cupboard and put a breadboard, several heavy glass pans, and two sacks of flower on top of it as a press.  Then I left it over night.  This is the part of the recipe that somewhat worries me.  Leaving cooked meat out over night seems dangerous to someone brought up to fear germs.  Still, it was wrapped up in three layers of wax paper and two of foil, so probably no harm.

The next day I pulled it out and cut it up.


Results:  Honestly, I wasn't that impressed.  Each of the parts tasted great on their own, but they just didn't come together for me.  It could easily be a problem with the ratios of bread to steak to filling, and I might try again with more steak per bite and more horseradish.  It might have been the bread, too.  The middle pieces I pulled out were tasty enough, but I don't think my oven was cooking hot enough and I'm not sure this was the perfect bread for this sandwich.  I may just get a loaf of good bread from a good bakery if I try again.

Overall I'm left with a feeling like I should have just eaten the steaks with the mushrooms and shallots on the side and bread with butter instead of going to all this trouble.

Oh, well.. they can't all work out perfectly. :)

Sunday, March 20, 2011

Week 12: Naan Better! - Naan Bread

This week is a quick one.  I just got back from vacation and didn't have my usual time to research and shop.  However, I've had an desire since I made Butter Chicken to make some Naan Bread to go with it.  We already had dinner plans for the evening, however, so I wouldn't be making the chicken, just the bread.

For my research this time, I turned to my trusty Artisan Bread in Five Minutes a Day book, which just happens to have a recipe!  Really, though, it has more of a "method."  Traditional Naan is cooked on the inside of a tandoori oven, which i don't happen to own.  Artisan Bread, however, suggests using a cast iron skillet.  I've needed a new one of those for a while, so I didn't mind buying one!

The recipe starts by using one of their standard doughs.  I approve of this since it makes a ton of dough and I can go through the whole week baking loaves, whether or not this works out.  It might be better to find a specific dough recipe, but this will work for an experiment like this.

The only ingredient I didn't have was ghee.  It's a clarified butter used in Indian Cooking.  In fact, it was recommended for Butter Chicken, but I didn't manage to find any.  This time, though, I found some at the local Indian grocery.  It wasn't in the dairy section.  It was on a shelf.  Apparently clarified butter doesn't need refrigeration.  


I used the standard "boule" recipe from the book.

3 cups warm water
1.5 TBS yeast
1.5 TBS Kosher salt
6.5 cups flour

Mix it and let it sit for two hours.  Then tear off a chunk.


I rolled it out to about 1/8th inch thick and set the cast iron skillet on the stove on high.


I added the ghee to the pan, spread it out, and then tossed in the dough.  I turned the stove down to medium, and covered it to keep the steam and heat in and let it cook for about 3 minutes before flipping it.


Then I cooked it on the other side until the edges were all done.  It was about another 3.5 minutes.

Tada!


It sure looks like naan!

Results:  Mediocre.  Don't get me wrong, the bread was tasty, but I wouldn't call it "naan."  It was more like an unsweetened pancake, or something.  There were hints of the correct flavor and texture, but not enough.

I think the big problem was probably the dough.  It's bread dough and so I got bread with some ghee flavoring.  I need to track down an actual naan recipe and see if there is a difference.  It might also have been a bit thick, but not by much.

On the plus side I now have enough dough for several good loaves!

Sunday, March 13, 2011

Week 11: Candyland 2: The Revenge - Popcorn Cake!

It's been a busy week, sandwiched between two trips out of town, so I decided to do something fun and new if not terribly ambitious.  While wandering through the interwebs I happened upon the perfect thing, a Popcorn Cake!

Honestly, I'm not sure what to say about the process.  I used Pop Secret Butter popcorn and got a great yield from the two bags.  I noticed while making it that it says right on the bag "Do not use the 'popcorn' button on your microwave."  I was amused, but followed the advice and it worked perfectly.  No more "popcorn" button for me!


I added the M&Ms and pretzel sticks.


I melted the butter, added in the marshmallows and cooked it until it was one delicious mass.


I mixed it all together.  You really have to make sure you get it mixed well.  Pockets of molten marshmallow like to hide on the bottom.

I didn't use a bunt cake pan since I don't have one and didn't want to buy one just for this.  I just spread it out like rice crispy treats, and left it to cool.


Verdict:  Delicious, of course.  It was like a giant popcorn ball!  I liked the addition of chocolate and pretzels as well.  It gives it a good variety of flavors and textures, especially because the popcorn tends to soften.  The M&Ms are little bursts of surprise flavor as you chew.

If I ever do it again I'll use a different kind of popcorn, though.  This one was fine, but I'd prefer it to be even saltier to contrast with the sweet more.  Maybe I'll use leftover popcorn from the movie theater!

Sunday, March 6, 2011

Week 10: Candyland - Caramels

It's a busy time for me, so I'm sitting back a bit and trying some of the "easier" recipes I've been wanting to do.  With that in mind my latest creation was making caramels from scratch.  I love caramels, even cheap ones, but I especially love buttery, expensive caramels.  They really aren't that difficult to make yourself, but they do have a couple of pitfalls to watch out for.

I didn't have to do much research because I'd already seen a recipe for caramels on a food blog I like to follow; Not So Humble Pie.  A Seattle based mom who makes food so delicious looking and decadent, it's like food porn.  You should go check it out.  There's always something good.

In any case, she made caramels from scratch and gave very precise instructions including how to avoid common problems.  Her recipe is fairly simple, but time consuming.

First up, was getting a new thermometer.  I have a candy thermometer, but it's old and I'm not sure how good it really is, so I decided to upgrade to a fancier one.  I bought one at Sur Le Table at Pike Place.  It's horrible.  I mean, it works, but not very well.  You have to try to get as much of the stem in whatever you want to measure as you can to get an accurate reading, which means holding it in your hand at an angle and waiting for it to climb to the correct temperature.  Bleah.  I'll have to investigate some others for next time.

The only difficult item in the recipe was the heavy cream.  You can get it at any grocery, but not if you want the really heartstoppingly bad for you variety she suggests.  And even that wasn't too bad since there's a dairy outlet in Pike Place.  They had several brands to choose from with ~40% fat content.  I went with the cheapest, and it worked great.

I decided since this was my first batch, I wasn't going to make salted caramels.  I wanted to see what they are like on their own, first.

I did exactly as the recipe said.  I mixed the sugar, karo (prevents sugar from recrystallizing,) salt, and half of the cream.  I brought it to a boil, stirring constantly, and it did take a while.  About 10 minutes as I recall.


I didn't really let the boil get going and that might have been a mistake.  Everything turned out in the end, but it took a lot longer than is should of.  Every time I added some of the cold cream the temperature dropped below boiling and so I had to wait until it climbed back up again.  So it was; pour, wait, pour, wait.  Eventually it got it all in and the mix didn't seem the worse for dancing on the edge of boiling the whole time.

The butter went in well, but took some stirring to incorporate properly. Then I let the whole thing boil.  This is where the new thermometer really blew.  I'd check the temp every five minutes or so, and it would take at least two more minutes to get a good reading.  In the end I really had to go with my gut.  You can kind of tell by watching when it's getting close because it starts looking a lot like caramel.  It took about 45 minutes for me, but my old stove was dying on me, so who knows how long a real stove would take.  I would trust her recipe.


I ended up using an 8 by 13 pan instead of 9 by 9.  So the caramels are slightly thinner, but that's fine.  I didn't coat the entire bottom with paper and didn't do a very thorough job buttering the paper.  Those were both mistakes and unless you like eating paper or scraping caramel out of a pan, learn from them.


Result: AMAZING.  These little balls of joy are so good.  Rich, buttery, but with a really great caramel taste. They are like candy crack to me.  I want to eat them all.  I scraped the cooking pan clean (not when I poured) and chewed off the leavings on the spatula.  I will definitely be making these again, much to my waistline's chagrin.

Saturday, February 26, 2011

Week 9: Let's Get This Pizza Party Started!

After creating my tomato sauce last week, I was somewhat disheartened about making pizza.  Plus there are the issues with my oven.  We bought a replacement oven that was supposed to be delivered on Thursday, but now looks like it will be delivered next Saturday.  Go Best Buy!  (on the plus side they knocked a bunch off the price for our "inconvenience."

In any case, I was going to make caramels this weekend, since the oven is down.  However we've discovered a work around.  We can still use the broiler, even if the normal heating element is dead. It heats the oven perfectly, so long as we put something between it and the food to prevent direct heat.  TA-DA!  Problem solved.  And since I still have my sauce and a batch of bread dough in the fridge, making the pizza after all seemed reasonable.

The dough I'm using is the Olive dough from Artisan Bread in Five Minutes a Day.  If you don't own this book and have any interest in baking bread, go get it now!  It's amazing.  Really.  It's so much easier to make bread this way.  No kneading, little proofing, it stores in the fridge for a week.  I can't sing enough praises for it.  You basically make a batch and then whenever you feel like it, you cut some off and bake it.  And it's delicious, light, fluffy... yum!

I made the batch when I made the sauce last week but I haven't gotten to use any of it because of the oven.  With our work-around, though, I figured it would be fine.

There really wasn't much to it.

I prepped my ingredients first since one key to pizza is to bring it all together as quickly as possible.  You don't want the dough sitting around while you're shredding cheese.  The cheese was whole milk mozzarella from a cheese shop at the Pike Place Market.  They also sold pepperoni there for some reason, but it looked good and so that's what I used.  It was a quality sausage and had to be peeled first.  Then I cut as thin of a set of slices as I could.

I got out the dough and rolled it flat to about 1/8 inch.  It was pretty easy to work with, especially coming from the fridge.  My daughter loved helping me roll it out, too, so bonus points there!

I spread my sauce out over the middle.  I used a pretty thin layer, but made sure it covered everything to within about an inch from the edge.

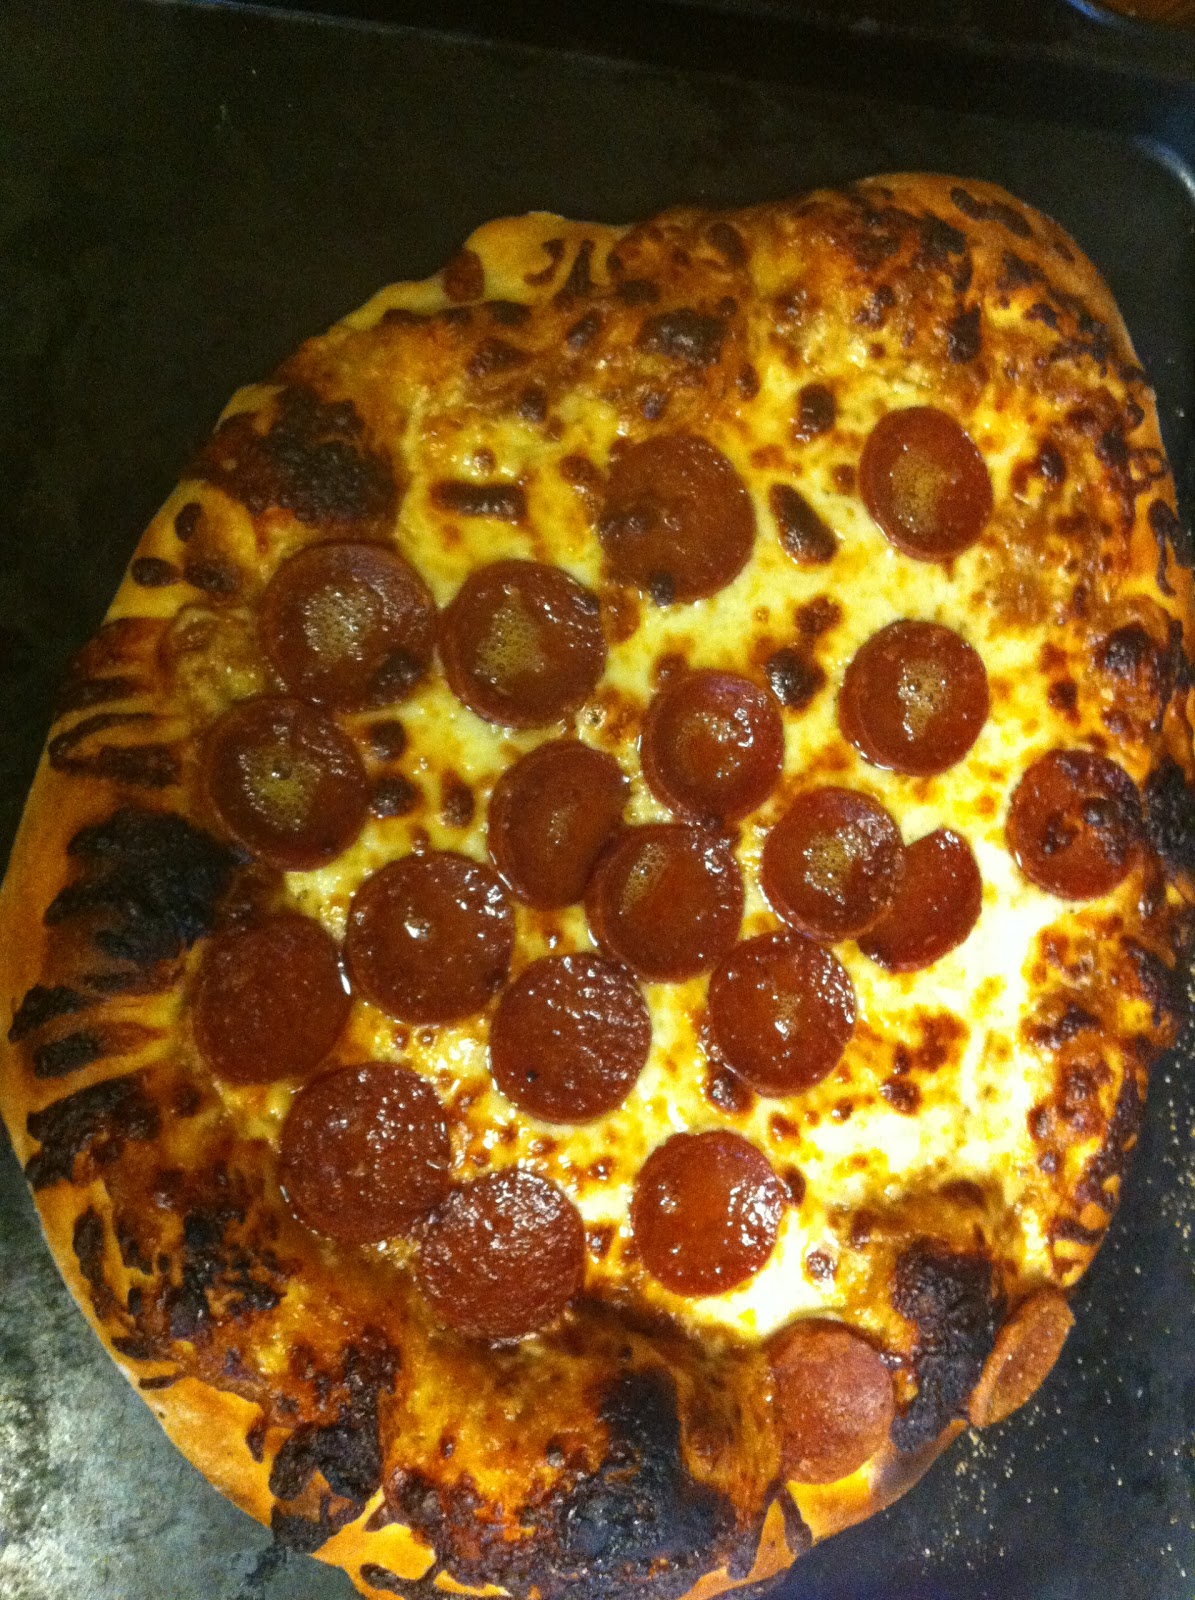
Then a thick layer of cheese, topped by a grid of pepperoni.  It was pretty awesome looking.

Now I ran into a problem, though.  I don't have a pizza peel.  I did all the work on the bread board, and transferring it to the oven was interesting. In the oven I used a set of uncoated terra cotta floor tiles I picked up for just such an occasion at Home Depot.  Transferring a large flat pizza from a breadboard to the grid of 6 tiles was challenging, but I got it done without too much warping.

I cooked it for 8 minutes before checking on it to make sure it was cooking evenly, which it was.  I left it in for another couple minutes then slid it out onto a cookie sheet to cool (so the cheese could set.)

Here's the final result:


And it tasted DELICIOUS!  I was shocked at how good it is, especially considering all the obstacles I had to overcome to make it.  The sauce, week old dough, the oven of doom, no peel...  It's a wonder this ever happened.

The sauce was a pleasant surprise.  It may have gotten a little better over the the week in the fridge, but really I think that even though I don't think it's awesome, it suits the pizza very well.  What flavor it does have is complimentary to the other ingredients.

The dough performed as advertised.  My biggest concern was that usually when dough is in the fridge for a week, you're tearing hunks off to make bread during that time so the top is always fresh, but this dough had simply sat there.  Well, I tore off the top layer and used what was underneath and it was perfect.  It was thick and chewy, but in a good way.  Not like over-kneaded bread, just like pizza.

The work-around for the stove worked perfectly.  There was a slight bit of scorching of some cheese, but that's all.  The stones did their part as well.

Other than the corned beef, this is probably my greatest victory, especially with the obstacles.  They just make it taste even sweeter.  I can't wait to try again with a sauce I'm happier with.  That will just make it even better.

Hmm... I should probably still do those caramels.  The 40% milkfat cream I bought won't last forever...

Sunday, February 20, 2011

Week 8: Possible Fail! Tomato Sauce

My plan was to make a pizza from scratch using homemade sauce, homemade crust, and quality ingredients.  That is unlikely to get completed in a timely fashion, as I'll explain in a bit, but I'm holding the fallback position of homemade tomato sauce for week 8, although that's not going well, either.

My research uncovered a plethora of homemade pizza sauces, each slightly different from the others.  Some use fresh tomatoes, others prefer canned, or for the really simple ones, tomato sauce.

Being an ambitious type, I searched for ones with fresh tomatoes.  I like to do things right!  I found one that I liked, except that it didn't contain all the spices I wanted, so I decided to add them!  Here is the one I ended up with:

10 roma tomatoes
1 large onion
2 T Olive oil
2 T butter
2 small carrots
5 cloves garlic
1/4 c fresh basil
1/8 c fresh oregano
1/4 tsp italian seasoning
1/4 tsp celery salt
1/4 cup red wine
2 T tomato paste

I chose romas because they generally have a good flavor and are more likely to be fresher than others in the middle of winter.  At least that was my theory.  I picked up 5 or so at the Pike Place Market, figuring those would be the freshest, but had to get 5 more at the grocery store to round out the recipe when I decided not to halve it as I'd originally planned.

I blanched the tomatoes to get the skins off and then squeezed out all the seeds.  I then pureed 8 of them and chopped the other two up roughly.  This was per the instructions on the recipe I was following.  In hindsight, since my final goal was pizza sauce, I should have just pureed them all, but it's not a huge difference.

I cooked the onion, carrot and garlic in the olive oil and butter for about 5 minutes to soften them.  Then I added the tomatoes and everything else except the paste.  The original recipe called for two celery stalks to cook in the sauce and get removed at the end, but I substituted a bit of celery salt instead.

I brought it to a boil and then reduced it to low, covered it, and let it simmer for 2 hours, stirring occasionally.  One thing I noticed was that it was not the brilliant red I usually associate with tomato sauce.  It was kind of orange, but the romas had looked fairly pale (although I grabbed the reddest I could find) so I didn't think too much of it.

After two hours I put in the tomato paste and set it to simmer for another 2 hours.  It cooked down fairly well, although it sort of ended up looking like a stew more than a sauce.  Once it was done, I let it cool and tossed it in the food processor to puree it smooth.

So here's the first part of the possible fail.  I'm not sure I like how it came out at all.  It doesn't taste disgusting, but it's not what I was hoping for, either.  It's kind of bland, and the flavors that are in it don't taste right.  I believe my problem is the tomatoes, which is of course the majority of the sauce.  It's the middle of winter, and the tomatoes are clearly from hothouses and from storage, so they don't have the flavor of summer tomatoes at all.  Honestly, canned sauce is probably better than what I made.

So, I'm not really sure what to do.  My plan was for pizza, and maybe this sauce will be just fine, but I was hoping for so much more.

Now we come to the second possible fail; my oven.  It has been slowly dying for a very long time.  It's temperatures are so far off I have to use a separate thermometer to check when it gets to the right one.  Half the burners don't work.  But today the oven decided to stop working.  I was still able to make the sauce just fine, but I obviously can't make a pizza until I get a new stove.  We'll go shopping tomorrow, but we'll have to wait for a new one to get delivered and such before I can do any baking.

I may try the sauce on pasta.  If so, I'll report back, but I don't have high hopes.

I'll definitely try again in the summer with good tomatoes, or possibly try one of the recipes that use canned tomatoes so I can still get on with a pizza.

Saturday, February 12, 2011

Week 7: Working My Tamales Off

For those who may have wondered why I posted about purchasing lard and what purpose I intended with it, ponder no farther, for it was to make TAMALES!  I've always wondered how to create those little corny pockets of meaty goodness, and what better time than Week 7 to try my hand at them.  How much work could they possibly be?

It turns out the answer is "A LOT."   Now, they weren't "corned beef" difficult, or anything, but there's a lot of assembly line work as well as two cooking process and ingredient preparation.  On the plus side, you can make a ton of them and freeze them or bring them to a party, or what have you.

I had no idea how they were actually made other than that you wrapped them in corn husks at some point in the process. My first step, as always, was the research.  Google turned up a lot of recipes and I browsed them quickly for general information, such as the fact that you steam them!  I also quickly found that Alton Brown has made them, and looked up his recipe.  It looked pretty good, except for a few small things.

First, it is for a large number of tamales (4-5 dozen.)  That's not really a big problem, as I can just halve it.

Second, it's for HOT tamales.  I have no problem with that, but as I've said here before, my wife isn't big on spices.  So I'll have to adjust it.

Last, his is for shredded beef tamales.  In general, I don't like shredded beef.  There is something about the texture I don't care for.  I wanted to make ground beef tamales.

I looked around for ground beef tamale recipes and picked up some good tips, but in general they didn't have good spice profiles.  I really liked all the various spices in Alton's recipe; smoked paprika, garlic powder, cumin. Most of the ones I found on the web didn't go much beyond chili powder.  I also liked Alton's masa recipe.

In the end I went with a Frankenstein creation; mostly Alton's recipe, but with a lot of my own ideas.  I used Alton's masa recipe and his spice list, but with ground beef, which required a lot of different cooking methods.

Here's what my recipe looks like:


  • 1 tbs chili powder
  • 1 tbs kosher salt
  • 1 tsp paprika
  • 1 tsp smoked paprika
  • 1 tsp garlic powder
  • 1 tsp onion powder
  • 1 teaspoons freshly ground black pepper
  • 1 teaspoon freshly ground cumin seed
  • 1 pounds hamburger
  • 2 tbs vegetable oil
  • 1 onion, finely chopped
  • 2 cloves garlic, minced
For the wrappers:
  • 2 dozen dried corn husks
For the cornmeal dough:
  • 1 pounds masa, approximately 3 cups
  • 1 tablespoons kosher salt
  • 1/2 tablespoon baking powder
  • 4 ounces lard, approximately 1/2 cup
  • 2 cups beef broth


Shopping was fun.  There are a number of good Mexican groceries in my area.  I stopped at the one in Pike Place first and bought the husks, masa (limed cornmeal,) and the lard (the glorious lard!) I have never worked with any of these as ingredients before so I was pretty excited; especially for the lard.  There's something naughty about using such a fattening ingredient in these modern "healthy eating" times.  I felt the same way about all the butter and cream in the butter chicken, and now I was buying LARD! I also picked up the smoked paprika and the cumin seeds from Market Spice.

Also on the agenda was buying a new steamer.  I bought one years ago to make rice, but it was pretty cheap and has long needed replacement.  A quick trip to Bed, Bath, and Beyond set me up with a nice 8 quart pot with a steamer inset.  I love buying cooking equipment!

Winco supplied me with everything else I needed, as always.  In fact, it turned out that I could have picked up the masa, husks, and lard there as well.  Good to know the next time I need them!

Early this morning I started with the husks.  I filled a mixing bowl with warm water and put the husks in.  I used a wide one, since the husks are pretty big.  I then put another, smaller mixing bowl on top of them with some water in it to hold them down.  You want them submerged if possible so the whole husk re-hydrates.

Then we took our daughter to see Tangled.  She was fascinated and sat through the whole thing.  That's a pretty good accomplishment for a two year old.  I really liked it, as well.  Disney still hasn't lost a step.

When we got back, I started in on the real work.  Since I was switching from shredded to ground beef, I had greatly reduced my cooking time.  Essentially, my plan was to make a kind of taco meat to fill the tamales with, using a modification of Alton's recipe.  If you compare my recipe above with Alton's you'll see that in general I used about a third of what he did.  That's both because I was only cooking half the amount of meat, and also because I wasn't going to be doing such a long cooking process that needed to penetrate a roast.

I started by cooking the onions and garlic in a bit of vegetable oil, just until they softened.  Then I threw in the pound of ground beef and the spices. I cooked it for about 5-10 minutes; until I was sure it was well cooked, but still moist.


While it was cooking, I started on the masa.  I mixed the masa with the salt and baking powder, and then mixed the lard in with my hands.  It works really well, I must say.  Then I poured in the beef broth.  Alton's recipe calls for using the remaining fluid from boiling the beef, but since I wasn't doing that step I used about a cup of beef broth and a cup of water as a replacement.


Some of the recipes online described the finished dough as being similar to thick mashed potatoes, and so that is what I was going for.  It turned out very close.

Now began the mass production part of the recipe.  You have to roll up the tamales one at a time, and each one takes a bit of time.  It was a learning process, and the last ones I made were far superior to the first ones I made.  Hopefully I can pass this knowledge on to you.

I found a site that had pictures of the entire process.  I followed it precisely, but incorrectly at first.  Looking at the pictures it's hard to get a good sense of scale.  As it turns out, the husks are not uniform in size.  I started with one of the larger ones I had and filled to the same proportions as the ones in the pictures.  Also, my impression in general was that tamales were fairly large, say the size of a fat enchilada.  This had created some confusion in my mind when I read all these recipes that promised 6 dozen tamales.  That seemed like a massive amount of food.

It is also fairly difficult to tell from the pictures how thick of a layer of masa to put on the husk.  I had some measurements from Alton's recipe of using about 2 tablespoons, which helped me to hone in on the proper amount eventually.  However, the first few tamales I made ended up being about twice as big as all the rest of them, and they had pretty think "shells."  They cooked up just fine, though.


So my advice from experience here is to follow the suggested amounts.  Use about 2 tablespoons of dough and about a tablespoon of filling.  Spread it pretty thin, too.  It will fluff up a bit during cooking.  You want to make sure that you can wrap the dough all the way around the filling.  The picture above is the first one I made.  I quickly learned as well to push the dough out all the way to the edge on one side.  It makes rolling it up so much easier.  You want to leave a gap at the bottom, though.

It's quite a job to roll up all the tamales.  I only ended up with about 18 in all, and I can't imaging doing 6 dozen.  Luckily I had some help!


The rolled tamales were placed carefully upright in the colander insert for the pot.  There's a smaller steamer insert, but it's pretty short, so I just kept the water level down and used the pasta insert.


In order to make sure they all stayed upright, I ended up using the extra husks I'd already soaked.  I folded them up and filled the space.

I brought the water to a boil and then turned it down.  Every half hour I checked on them and added some water to the pot.  It took about an hour and a half until I decided they looked done.  I removed on and let it cool for 5 minutes before unwrapping it.  The masa was nice and firm, so I declared the batch done!


Result:  Pretty good.  The texture was perfect.  The meat turned out well. There's plenty of flavor here, but they still seem bland to me for some reason; like something's missing.  I added sour cream and hot sauce to mine and that brought them up quite a bit.  I think, though, that something like enchilada sauce would have been just about perfect.  They also would have gone well with a side of something.  Maybe some beans or cheese.  Here's a gratuitous picture of my daughter enjoying hers, though.


I'm glad I did this, of course, but I don't know if I'll do it again any time soon.  It might be good party food, though, and if I can zero in on some other flavors it would be much improved.  If I do it again, I'll make a sauce and try a different meat.

But it's no butter chicken...